Auto Reply Apps to Use in 2025
Safe Driving Auto Reply Android App
In an age where connectivity is a constant expectation, driving safely while managing communication becomes a significant challenge.
Android app – SMS Autoresponder for Texts and Calls while Driving designed to offer drivers a safe and convenient way to handle their communication needs without distractions.
Don’t Text and Drive Features
- Automatic Activation: When your phone pairs with your car’s Bluetooth, the auto reply activates automatically.
- Customizable Auto Replies: Allows users create personalized responses based on the recipient, ensuring relevant communication.
- Text-to-Speech (TTS) Service: Reads incoming messages aloud, enabling drivers to listen to their messages without taking their eyes off the road.
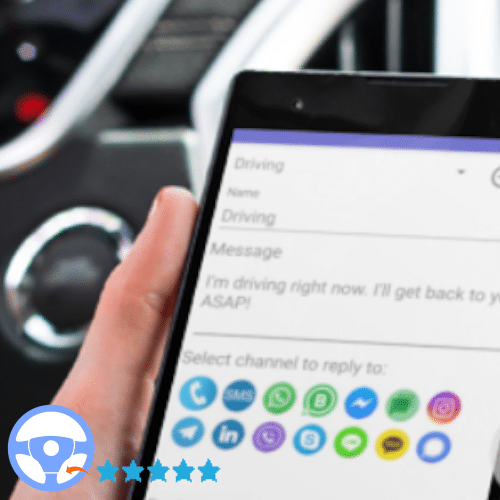
- Integration with Social Media and Messaging Apps: Works with popular platforms like WhatsApp, Facebook, Telegram, and 15 more.
- Do Not Reply List: Lets users add specific contacts to not reply to.
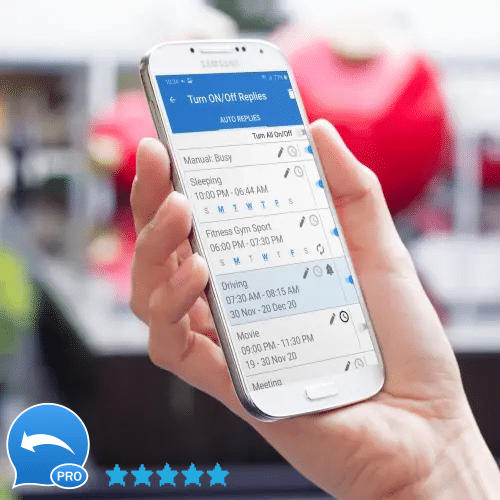
- Scheduled Replies: Can set recurring auto replies.
Safe Driving Features
The primary aim of SMS Autoresponder is to enhance road safety by reducing the risk of distracted driving, a leading cause of traffic accidents.
- Hands-Free Communication: By leveraging text-to-speech technology, the app allows drivers to focus on the driving tasks.
- Distraction-Free Interface: Designed to minimize the need for physical interaction with the phone, thus keeping the driver’s eyes on the road.
- Emergency Communication Handling: Prioritizes critical communications while suppressing non-essential interactions.
Responsible Defensive Driving
- Professional Drivers: Including truck, bus, and taxi drivers who require constant communication but must remain focused on driving.
- Commuters: Regular drivers who commute to work and need to stay connected with family or colleagues.
- Parents of Teen Drivers: Who seek to ensure their children practice safe driving habits.
- Defensive Drivers: Who take proactive steps to minimize risks on the road.
Benefits of Using SMS Autoresponder
- Enhanced Safety: Significantly reduces the chances of accidents by minimizing physical interaction with the phone.
- Maintained Connectivity: Ensures you stay in touch without compromising on safety, providing peace of mind to drivers and their loved ones.
- Regulatory Compliance: Helps adhere to local laws against mobile use while driving, avoiding potential fines and legal issues.
- Customization: Offers personalized communication strategies that reflect the driver’s situation and needs.
Research-Based Arguments: Hard-hitting Statistics
- Distracted Driving: Studies show that texting while driving increases the risk of a crash by 23 times!.
- Daily Accidents: Approximately 8,000 accidents in the USA alone are attributed to distracted driving each day,
Experience the Power behind the Keyword based Autoresponder for Text Marketing
Reach Your Audience Through the Power of Text Message Automation!
Your customers and potential clients want information right away when it’s relevant to their current activity and texting is the preferred way to get that information. Because of the Relevance of Information (sent via auto reply) that arrives exactly when the user is planning to buy a product or service, Conversion Rates Are Higher than with proactive sms marketing FEATURES OF BUSINESS MARKETING AUTORESPOONDER
UNLIMITED AUTO REPLIES
Automate your communications! Configure UNLIMITED KEYWORD-BASED AUTO REPLIES when messages are triggered by specific keywords. Remove repetitive steps from your workflows!
15 SOCIAL PLATFORMS
Our app support keyword based auto reply to 15 most popular social platforms where clients may contact you.
MMS (PICTURE MESSAGING)
Reply with enhanced messages to your clients/customers. Attach images, video, presentations and other multimedia files.
IMPORT AUTO REPLIES
You can import (create and activate) multiple auto replies data from a csv (excel) file into the app.
EXPORT COLLECTED LEADS
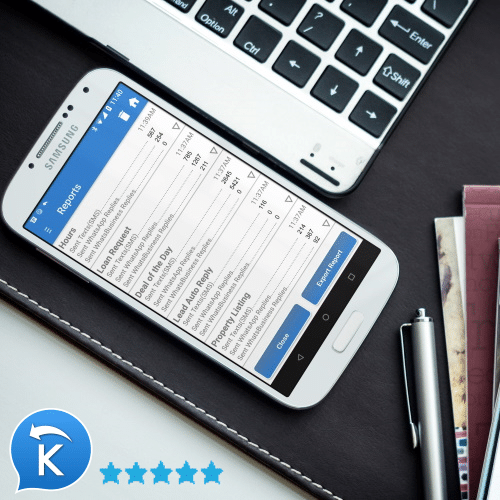
The leads data that is stored and available in the app’s Reports could be saved via a CSV Export and ready for upload into Marketing Automation systems, Excel, or CRM.
GOOGLE VOICE SUPPORT
You can use keyword-based sms autoresponder with your FREE virtual Google Voice number to auto reply to your contacts.
With Text Message Automation – Customers Get Relevant Information – Businesses Save Time and Resources
SMS Marketing Auto Reply App for Your Business!

Is it Right for you?
There are so many different ways to use Keyword based SMS Marketing Auto Reply App, that the possibilities are literally endless. see 50 Possible Uses
An App can be applied to a wide range of industries and niches. Here are more examples of industries and niches that can benefit from this approach:
Real Estate, Travel and Hospitality, Fitness and Wellness, Beauty and Cosmetics, Financial Services, Tech Support, Nonprofit Organizations, Fashion and Apparel, Home Services, Sports and Recreation , Parenting and Family Services , Pet Care , Legal Services , Entertainment and Events, Online Courses and Education, Home Improvement , Culinary and Cooking and more
REAL ESTATE
Provide property listings, schedule property tours, and share information about the home buying process.
HOSPITALITY
Reply with vacation packages, flight details, hotel reservations, and travel tips
RETAIL
Distribute Discount Codes, Special Offers, information about Membership and Loyalty Programs, VIP clubs.
SMS Auto Reply App for Missed Calls for Small Businesses and Self-Employed
Texts and Calls Auto Reply Android App – automation app that help you to Automatically Reply with Text Messages to Missed Calls, Incoming Texts, Signal, Telegram, Facebook, WhatsApp + 14 more Messengers 50 + Available Features.
SMS auto-reply app is incredibly beneficial in scenarios where professionals like manicurists, cosmetologists, barbers, dentists, midwives, surgeons, or nurses are occupied with clients and unable to immediately respond to calls or texts.
Immediate Acknowledgment:
The app can instantly acknowledge missed calls or incoming messages with a pre-set response
Information Dissemination:
The auto-reply app could send additional information, for instance: appointment availability, service details or price lists, emergency contact information or instructions.
Customized Messages:
“Currently attending to a client. I’ll get back to you shortly. For urgent matters, please use keyword ‘urgent’.”
Managing Expectations:
The app helps manage client expectations by informing them when they can expect a response or by providing alternative ways to address urgent concerns.
Reducing Missed Opportunities:
Clients receive immediate feedback, reducing the chance of them seeking services elsewhere due to lack of initial response.
HELP YOU 24/7 TO BE EFFECTIVE AND CALM!
AFTER HOURS
Set After Hours, Out of the Office auto reply message and let people know that you will get in touch with them as soon as you back to work. Earn your evenings back!
VACATIONS / HOLIDAYS
You NEED this calm vacation for stress relief, let it happen by setting auto reply texts to messages from users and co-workers while you’re on vacation.
MEETING / NOT AVAILABLE
You are just about to enter a meeting – it would a wrong moment to be on your phone. Set SMS auto reply message to be sent to anyone who contact you throughout the duration of the meeting.
QUALITY SLEEPING
Our app will silence your phone and send auto replies once you are sleeping – get quality sleep, protect your mental health, quality of life, and safety.
SAFE DRIVING
Send text auto reply message to incoming texts and missed calls when you are driving or/ and let an app to read out your incoming text messages aloud to be safe and prevent distractions.
BUSY / AWAY
Texting auto reply app will help you not to be disturbed when you are busy, out of office, gym, movie, class etc.

BEAUTY
Salons / Spas / Nail Tech / Barbershops / Massage Centers / Skin Clinics – provide details about services, packages, pricing, availability, gift cards and more
FOOD AND BEVERAGE
Provide Menu and Specials, entry requirements, charges, and dress codes, reply to requests of event schedules, DJ lineups, and themed nights
HEALTHCARE
Dentist, Midwife, Surgeon, Nurse – reply with Emergency Contact details, Appointment Scheduling URL, how to request prescription refills etc.
This (I would have to assume for most people) is one of those rare ‘must-have’ apps. And because it’s a one time purchase, it’s easily worth 5 times the price.
Todd Warden
I use it for my business phone and it’s awesome.I’ve gotta’ say, this app works really well.
Ryan Dittmann
Does exactly what it says on the tin, and it works 24/7, precisely as i need. Definitely on my tool belt!
Brett Brennan
Really helpful and much needed in my line of work
Kenneth Hankins
Finally found Call / SMS Auto reply app that actually works on Android 11.
Team Gastardo
In 2025, text marketing autoresponders are becoming increasingly popular and are considered one of the most effective methods for businesses to reach their customers.
SMS autoresponders are tools that automatically reply to text messages from customers based on specific keywords or triggers.
User Manual for Keyword-based Autoresponder
By utilizing these autoresponders, businesses can engage with their audience in a highly efficient and timely manner.
Being Able to Specify Keyword Triggers
- One of the key features of text marketing autoresponders is the ability to set up keyword triggers.
- With this functionality, businesses can define specific keywords that, when sent by a customer, trigger an automatic response.
- This means that customers can easily access information or services by texting a keyword, making it a convenient and user-friendly approach.
Instant Information Setup and Implementation
- Setting up and implementing keyword-triggered autoresponders is incredibly fast and straightforward.
- Businesses can create and customize these responses within a matter of seconds, allowing them to adapt their marketing strategies quickly.
- This rapid response capability is crucial in an age where consumers expect immediate information.
Auto Reply SMS Marketing Campaigns are Fully Automated
- Auto reply SMS marketing campaigns refer to the process of sending automatic responses to incoming text messages.
- These campaigns are fully automated, meaning that there’s no need for manual intervention when a customer sends a keyword or initiates a conversation.
- The automation streamlines the customer engagement process and frees up business resources for other tasks.
Text Back the Information That Users Have Requested
- Autoresponders deliver the specific information that users request, based on their keywords or queries.
- This ensures that customers receive relevant and personalized responses, enhancing their experience with the business.
- By meeting users’ needs promptly, businesses can build trust and loyalty.
98% of SMS Are Opened vs. 22% of Emails
- SMS messages have an exceptionally high open rate, with 98% of them being read by recipients.
- In contrast, email open rates are significantly lower at around 22% or lover
- This high open rate for SMS makes it a powerful medium for reaching customers with important information.
100% Read
- Unlike email, where messages might end up in spam folders or go unnoticed, text messages are typically read by the recipient.
- This high read rate makes SMS marketing a reliable way to ensure your message gets in front of your audience.
Text Marketing Autoresponder in 2024 offers businesses a powerful and efficient way to engage with customers. They enable instant, automated responses to customer queries and are particularly effective due to the high open and read rates of SMS messages, making them an essential tool for small businesses looking to connect with their audience in a smart and effective manner.
SMS Marketing Auto Reply App for Real Estate automatically respond to requests submitted by your customers, allow you Provide Information to Clients and Leads, Instantly and on Demand
REPLY WITH
- Property Details
- Link for an In-Depth Tour of the Property
- Scheduled Showing
- Property Listings
- Property Profile, Size and Price
- List of Documents to Fill In
- Ways to obtaining a loan to buy a property
- Ways to finance the purchase.
- Answer Common Questions

Benefits of Keyword based SMS Marketing Autoresponder
High Open Rates, Response Rates and Conversion Rates
Text messages do not get lost due to spam filtering or categorization problems, like email sometimes does and the response rate is several times higher than email. The conversion rate for an email marketing message is around 1.5% while the response rate for SMS is 8.5% – 95%.
GET STARTED IN 3 CLICKS!The System Responds To An Inquiries 24/7
Your business is still able to be “on” even when you aren’t, and that doesn’t just include evenings and weekends – that also includes holidays, vacation times and more.
Boost Awareness
Any SMS message you are sending out may go viral, since people are sharing (forwarding) interesting info with friends and family. You are sending 1 (one) SMS and putting your brand on a multiple phones.
Cost-Effective and Affordable
It is affordable for any business budget – literally. With the price of keywords starting at just $7.45 (12 months subscription), every business in the world will be able to afford it.
It’s Time Efficient
If you are like most businesses, get at least a few repetitive questions regularly, setting up an keyword based SMS Auto Replies could free up some serious time and make your business more efficient.
At World-Class, we love SMS Marketing Auto Reply app. People can text class name and get a full info and hours of yoga, cardio dance, Zumba etc. We have more than 30 keywords set up now.
World-Class Health Club
I didn’t really think it would be as popular with our customers as it has been. We use this app for: events, daily pint specials, new brews and more and amazingly, our response was huge.
Frank’s Pub
We have implemented Keyword based Autoresponder to provide backup emergency response to requests for help in the event an operator is away from the device.


